Adding Companies and Attendees
Once you have created the event and its agenda, it is now the turn of uploading your attendees to the system. You can do it manually or by using our wizard to upload all them at once, this second option is very useful for Conferences having hundreds of participants attending the Conference, Webinar, etc….

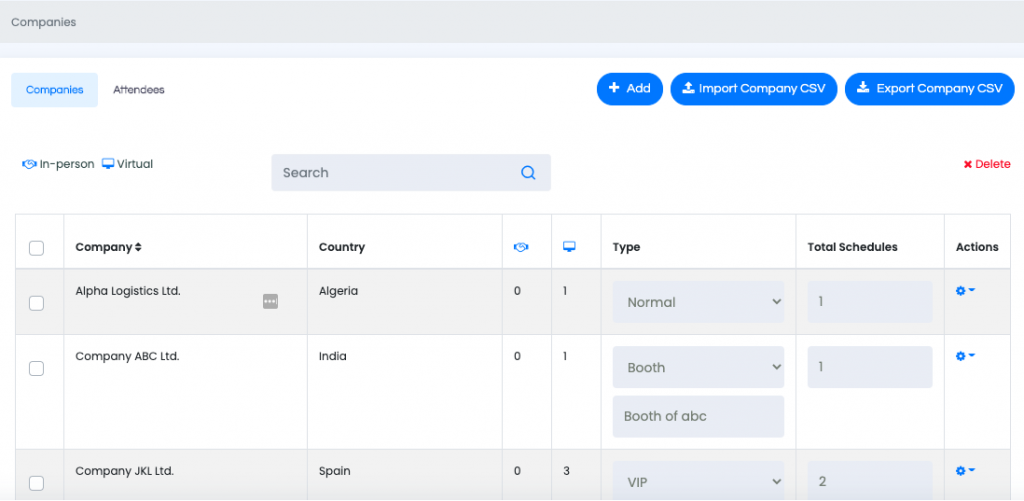
As you see in the above screenshot, there are two main tabs in this section, Companies tab and Attendees tab, at the end both are linked and working together, but they are separated to make this section much more confortable to manage.
Basically, from Companies tab you will be able to view and manage the Type of Company (Normal, VIP or with Booth).
To quickly differentiate all of them:
Normal: Companies/Attendees with no special rights. For in-person events, these Attendees will have to go to the assigned table num for every meeting they have with another Normal Attendee.
VIP: These are Companies/Attendees that do not have a Booth contracted in the Venue, but they will have assigned one specific table num. for all their in-person meetings, so they don’t have to move around during their meetings with other attendees during the Conference.
BOOTH: These are Companies/Attendees that have a specific area in the Venue, maybe a booth area or stand, where all Attendees of this specific company will have their meetings with other attendees taking place.
When there are more than one Attendee from a same company, you will be able to assign if they want to have their meetings with others separately or if they want to have their meetings together in the same table under a unique schedule. Obviously if they prefer to have meetings together they will be loosing meeting slots / opportunities to reach many more attendees within all meeting sessions.
